
Just a couple of years ago, I considered OpenWRT the pinnacle of convenience and flexibility for small networks. To get this firmware, I spent a fair amount of money on hardware, not exactly budget-friendly. However, I didn’t get exactly what I wanted. Yes, I was able to implement some bells and whistles into my home network, such as traffic prioritization management, router-based network storage, client statistics tracking, and even VoIP server support on the same hardware. It seemed like I could now control everything, and it was all relatively simple. Then one day, I decided to play around with a device not very popular among regular users. I got my hands on the Mikrotik hAP lite.
The device itself is one of the brand’s least expensive products, but it’s worth noting that almost all models offer roughly the same set of features. And this set includes features you’re unlikely to find in home routers.
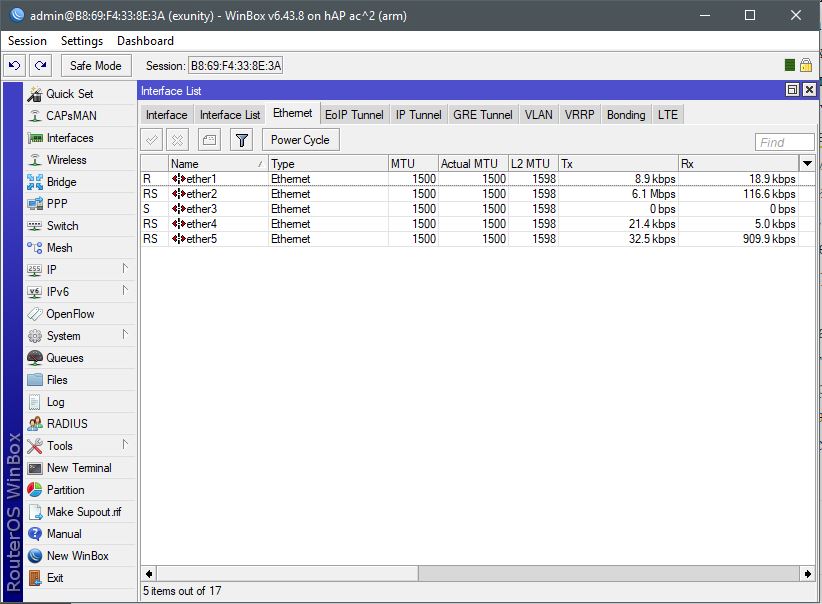
Regardless of price category, all Mikrotik routers run the proprietary RouterOS operating system and offer a roughly identical feature set. Any differences are primarily related to the hardware interfaces. The exception is virtualization support, which depends on the processor architecture.
My first experience with RouterOS was a pleasant one. I was most impressed by the presentation, which combined a huge number of professional-grade networking technologies. The device’s configuration interface contains virtually everything one could possibly cram into a router, yet it’s all organized in a highly understandable and user-friendly manner. Furthermore, compared to routers running standard Linux distributions, RouterOS feels monolithic and therefore a much more reliable system. This becomes especially noticeable when you notice how well-connected the settings in different parts of the configuration interface are. For example, deleting an object that another object depends on won’t cause unexpected errors or prevent the entire service from starting.
My home network will never be the same again…
Holding such a «mad combine harvester» in your hands, you just want to try everything it can do. :) Of course, much of this is simply unnecessary for a small private network. Still, I stretched my imagination and spiced up my home network with a few interesting features.
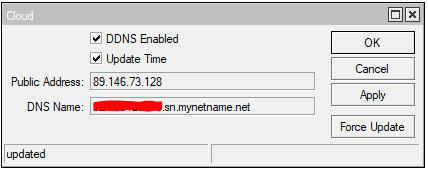
We’re having trouble with static storage, so let’s enable DDNS first. The name is long, but at least it’s free. ;) By the way, if you have your own domain, you can make life easier by creating a CNAME record and attaching it to the free domain. Just remember to set the TTL as short as possible.
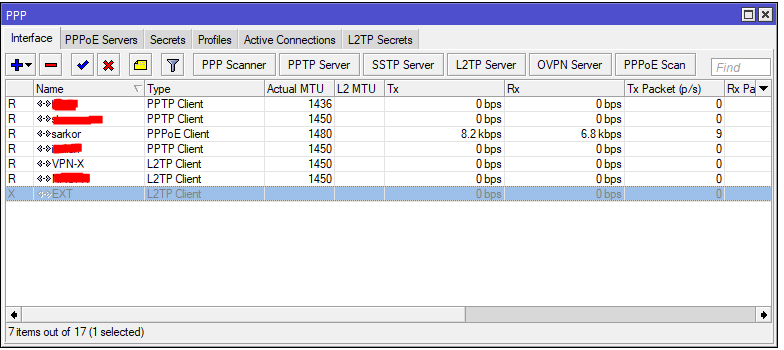
My job requires me to manage several closed networks and everything within them. For this, I use VPN tunnels. Previously, I would connect to each of these tunnels directly from my work computer as needed. But it’s much more convenient to have constant access to all networks simultaneously. The RouterOS license level 4 (which comes with home models) allows for up to 200 VPN connections. This should be enough for even the most seasoned system administrators. ;) To avoid creating additional routing tables with address forwarding, I ensured in advance that the subnets behind each of these connections were different and did not overlap.
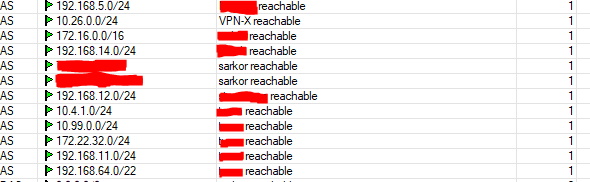
Remove the default route from VPN connections and instead add static routes to each subnet. Specify the VPN interface name as the gateway.
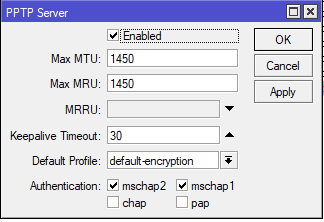
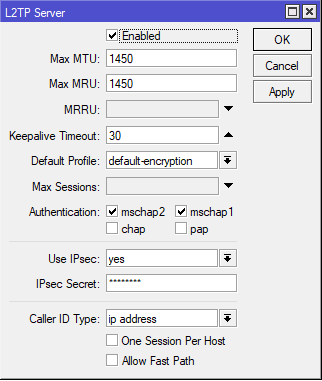
Now that my home router has become a control center, I need to make it work outside the home. To do this, I need to set up a VPN server that I can connect to from anywhere. I’ll use the DDNS name I previously obtained as the server name for the remote connection.
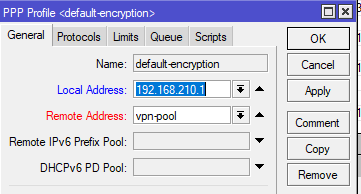
There is no limit to flexibility here, so you can afford to separate fly cutlets Separate the guest network from the main one, for example, to prevent clients on your Wi-Fi from accessing areas they shouldn’t. To do this, you can create several different IP address pools and restrict transit from one subnet to another in the firewall, thus isolating them from each other.
I didn’t configure OpenVPN and SSTP, since connecting via these protocols requires specific configuration on the client side, while PPTP and L2TP haven’t let me down yet.
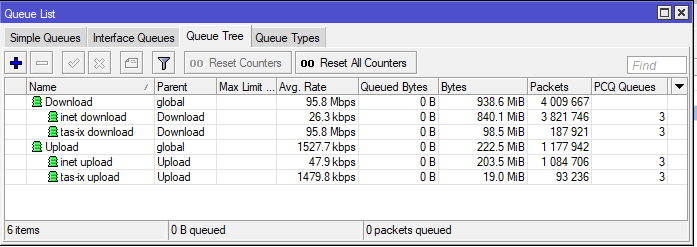
If you need to configure QoS, you need to consider the speeds of different network directions. In my case, some resources in the Tas-ix direction are available at 100 Mbps, while everything else is limited to a 5 Mbps tariff plan. Therefore, I would never have been able to share the speed equally if I hadn’t separated the queues by direction. To do this, I added the required subnets to the Address List and assigned incoming and outgoing connections accordingly.
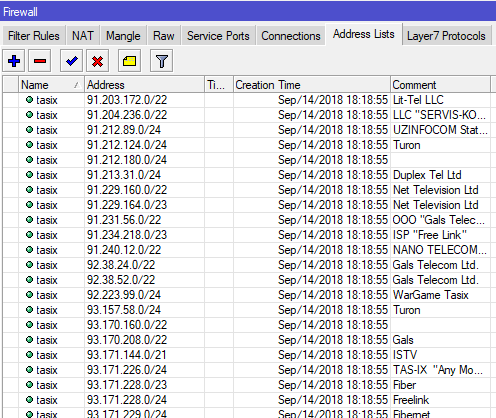
Now traffic on my home network is shared among all its clients, like brothers. ;) If necessary, individual clients can be given personalized restrictions. By the way, the Address List supports not only IP addresses but also domains. In this case, a dynamic record with its resolver will be automatically added to the added hostname record.

IPv6
I have a dynamic IPv4. Dynamic, but at least it’s white! So, I could add something else. For example, enable IPv6.
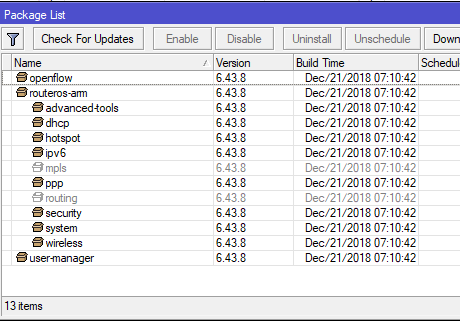
To do this, you need to enable the package of the same name. You can also disable anything you definitely don’t want to use. Don’t be afraid to disable the «routing» package. It only includes professional routing protocols that are unlikely to be needed in a home or office environment.
Now that the IPv6 packet has been added, we need to get the network. If your provider offers native IPv6, great! In my case, the only option available to me is a tunnel broker. That’s what we’ll talk about.
Register here https://tunnelbroker.net/
After registering and adding a new tunnel, you can begin configuring Mikrotik.
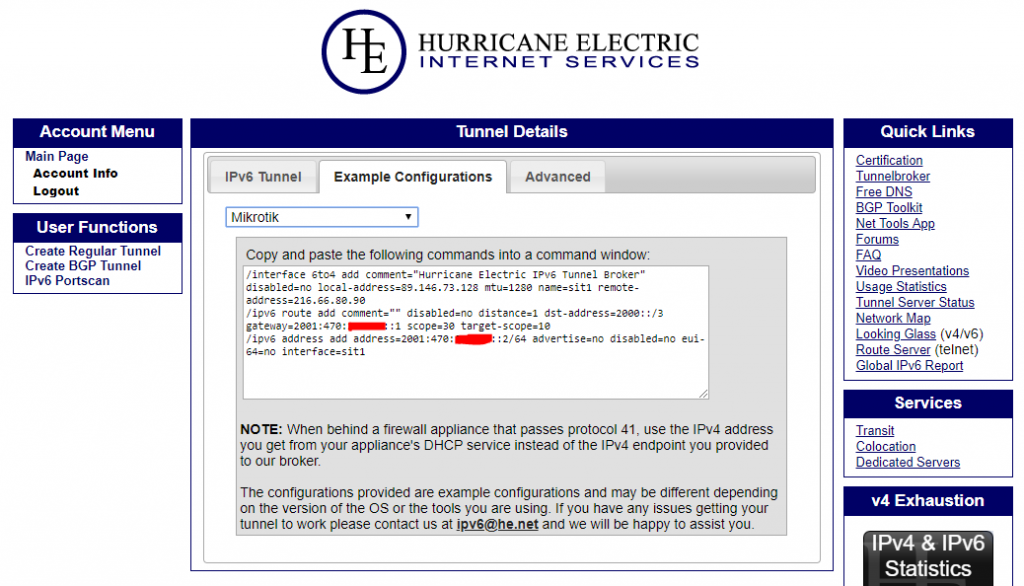
A nice touch is that Hurricane Electric has built a settings generator into the dashboard with templates for different hardware types. Feel free to enter these settings into your router. For more detailed instructions on assigning addresses to your LAN, as well as configuring DNS and a firewall for IPv6, see https://telecom-sales.ru/content/stati/nastrojka-ipv6-s-pomoshyu-tunnelbrocker-na-mikrotik/
Since my IP address is dynamic, I needed a script to update the external address on the tunnel broker side. The script looks like this:
:local HEtunnelinterface "sit1"
:local HEtunnelid "ПАРОЛЬ"
:local HEuserid "ЛОГИН"
:local HEmd5pass "КЛЮЧ ОБНОВЛЕНИЯ ДЛЯ API"
:local HEupdatehost "ipv4.tunnelbroker.net"
:local HEupdatepath "/nic/update"
:local WANinterface "Имя WAN интерфейса"
:local outputfile ("HE-" . $HEtunnelid . ".txt")

# Internal processing below...
# ----------------------------------
:local HEipv4addr

# Get WAN interface IP address
:set HEipv4addr [/ip address get [/ip address find interface=$WANinterface] address]
:set HEipv4addr [:pick [:tostr $HEipv4addr] 0 [:find [:tostr $HEipv4addr] "/"]]

:if ([:len $HEipv4addr] = 0) do={
   :log error ("Could not get IP for interface " . $WANinterface)
   :error ("Could not get IP for interface " . $WANinterface)
}

# Update the HEtunnelinterface with WAN IP
/interface 6to4 {
   :if ([get ($HEtunnelinterface) local-address] != $HEipv4addr) do={
      :log info ("Updating " . $HEtunnelinterface . " local-address with new IP " . $HEipv4addr . "...")
      set ($HEtunnelinterface) local-address=$HEipv4addr
   }
}

:log info ("Updating IPv6 Tunnel " . $HEtunnelid . " Client IPv4 address to new IP " . $HEipv4addr . "...")
/tool fetch mode=https \
                  host=($HEupdatehost) \
                  url=("https://" . $HEupdatehost . $HEupdatepath . \
                          "?hostname=" . $HEtunnelid . \
                          "&myip=" . $HEipv4addr) \
                  user=($HEuserid) \
                  password=($HEmd5pass) \
                  dst-path=($outputfile)

:log info ([/file get ($outputfile) contents])
/file remove ($outputfile)
The script can be launched via Shedaller or event-driven. I’ve found the former to be more successful.
Guest network with separate Internet access.
The New Year holidays are a great excuse to do good! So I got around to it and decided to share my Wi-Fi with everyone around me. But since I’m not supposed to let strangers roam my network, and I didn’t want to let just anyone use my home IP address, I decided to get crafty.
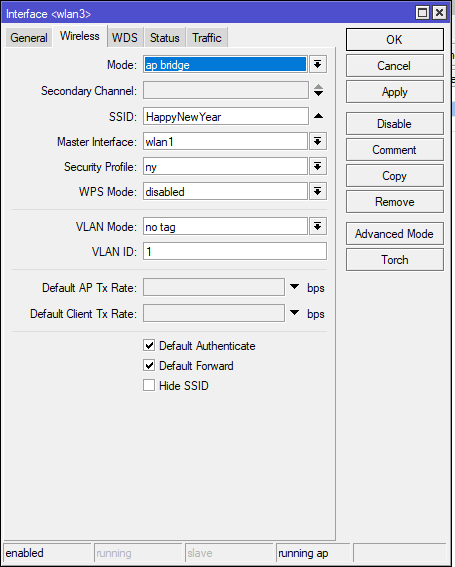
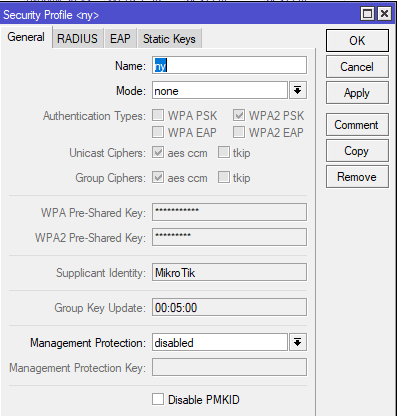
We create a guest network on the virtual interface and attach an open profile to it.
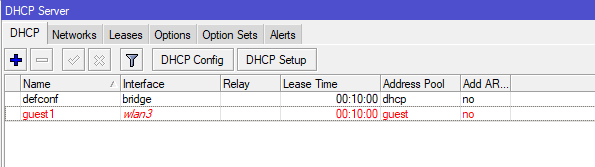
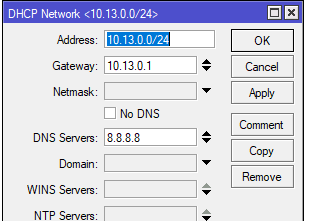
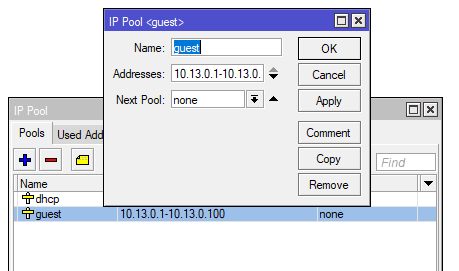
We configure DHCP for the guest network and give it some left pool.
Now comes the most important part. Let’s add routing. To do this, we first need to mark the packets originating from our guest network.
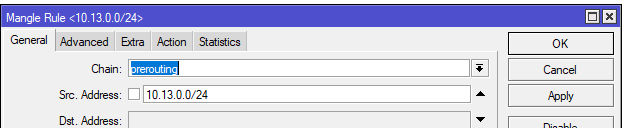
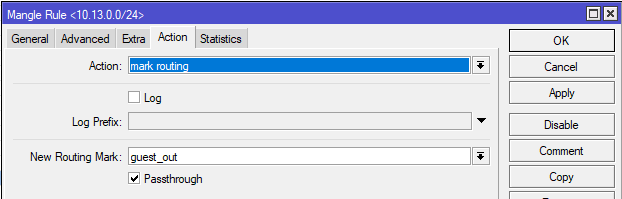
And the route will go through the VPN interface.
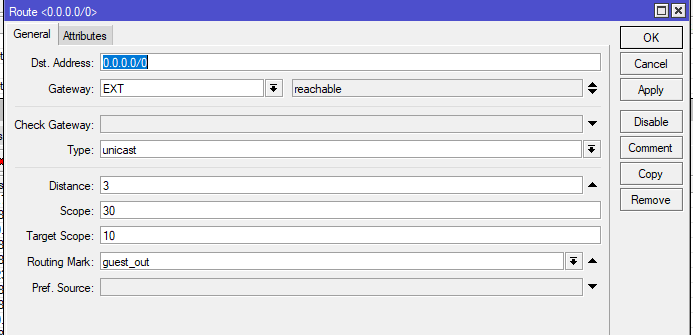
Now, if we leave everything as is, if the VPN fails, users on the guest network will suddenly fall back to regular routing and even gain access to the local network. To prevent this, let’s add two rules to the firewall.

First, we’ll allow VPN transit, and second, we’ll block everything else from the guest interface. That’s it!
To be continued, most likely… ;)