
Disclaimer: This article is not an advertisement for the Artel brand; I just happened to buy it. ;) Furthermore, the method described below also works with its other OEM counterparts, of which there are quite a few.
If you’re too lazy to read the entire article, you can skip straight to the technical gist by clicking here .
A difficult choice
Few would argue that an air conditioner is a key element in a smart home. But which air conditioner is most compatible with this very smart home?
Ideally, I wanted to buy a product that would integrate with Home Assistant out of the box, or at least just with mqtt. But everything I found online had absolutely nothing to do with the local market.
As a compromise, I started looking for something that would at least somehow connect to Wi-Fi.
The summer was hot, my budget was tight, and I chose the Artel Art-12HI. Thanks to our country’s customs policy (they’re a real help), the price of this device was significantly lower than its imported competitors. At the same time, a friend who works in air conditioning said it was practically a copy of the Chinese Aux (and other OEM clones) and the internals were generally unassailable.
«Well, to hell with it, let’s take it!» I thought, and went off to buy it.
First acquaintance
The air conditioner turned out to be truly worth its price. Or, at the very least, I got a well-assembled unit… It reaches the desired temperature fairly quickly, and I didn’t notice any particularly annoying noise from the indoor unit. Anyway, after checking out its basic functionality, I started exploring its «smart» features. And that’s where I got a very unpleasant surprise!
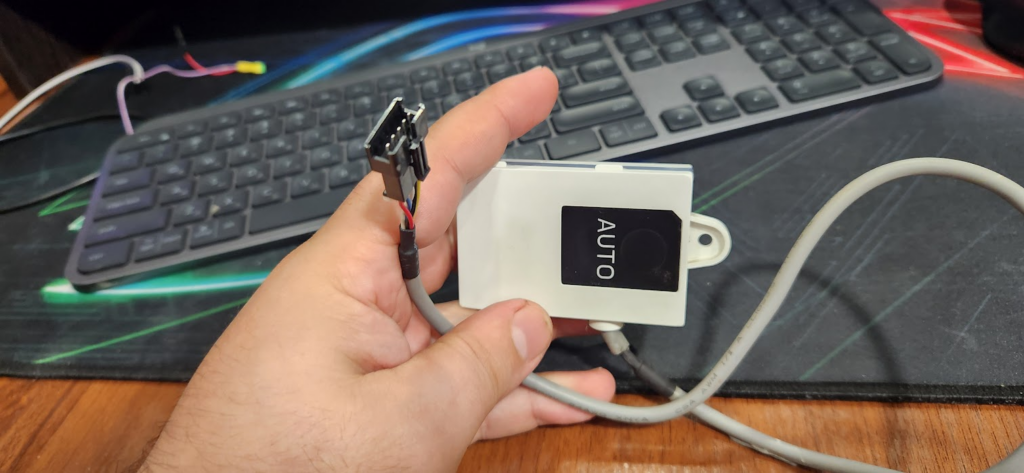
The «smart» module is some OEM device from Broadlink. I previously used a Broadlink «smart remote,» and it was absolutely terrible. So, seeing this name again, I immediately suspected something was wrong. The user interface for this module is the «AC Freedom» app, which operates through a Chinese cloud. And this cloud is periodically unavailable! And even if it is available, commands sent to the air conditioner can be executed with a 5-10 second delay. The saddest part is that the air conditioner has no direct integration with either Home Assistant or Yandex.Station. Well, let’s take a roundabout approach…
How to add to Home Assistant?
After all, this system does have local control. And if it exists, surely it can be interacted with somehow?
Method #1 (software)
After googling, I came across a project by some enthusiast, which is a software adapter between the broadlink module and mqtt.
I installed it. And basically, it was just what I needed! The software connected directly to the module and allowed me to output the most basic air conditioner functions to MQTT. Some of the functionality available in the native app was still missing, but that didn’t bother me too much. With MQTT, I was able to get the air conditioner into Home Assistant and then into Yandex Station. Unfortunately, this time I encountered instability in the WiFi module itself. The air conditioner would stop pinging, and then the software intermediary would crash.
I tried using workarounds for monitoring and restarting the software, but at least once every 4-6 days the controls would completely stop working and require manual intervention. For about three years, it worked with varying success, and I regularly reached for the physical remote.
Method #2 (hardware)
One day, this got to me so annoying that I started thinking… Why do I even need a proprietary Wi-Fi module with all its hacks? After googling about reversing the air conditioner communication protocol, I was stunned by what I found! It turns out that someone had already posted an excellent solution for this family of OEM clone air conditioners: «Custom ESPHome component for Wi-Fi air conditioner control.»
Getting to the point…
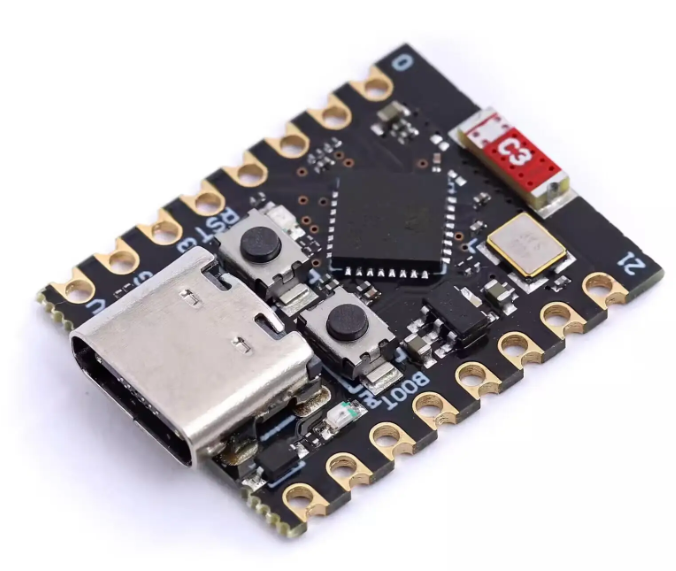
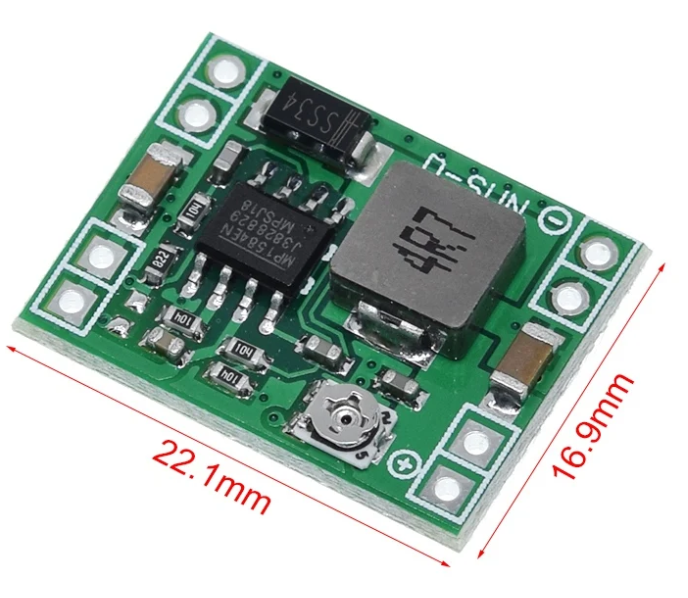
The hardware required was: esp32-C3, a step-down DC-DC module (from 14 to 5 volts) and wires.
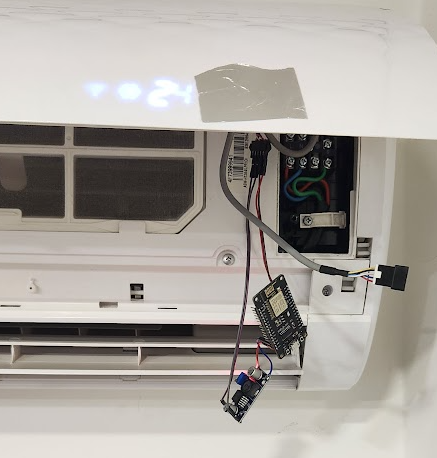
The photo shows the first version of the control module, assembled on a nodemcu esp8266 with a huge step-down voltage regulator. The entire setup didn’t fit under the air conditioner cover and was replaced with a more compact kit.
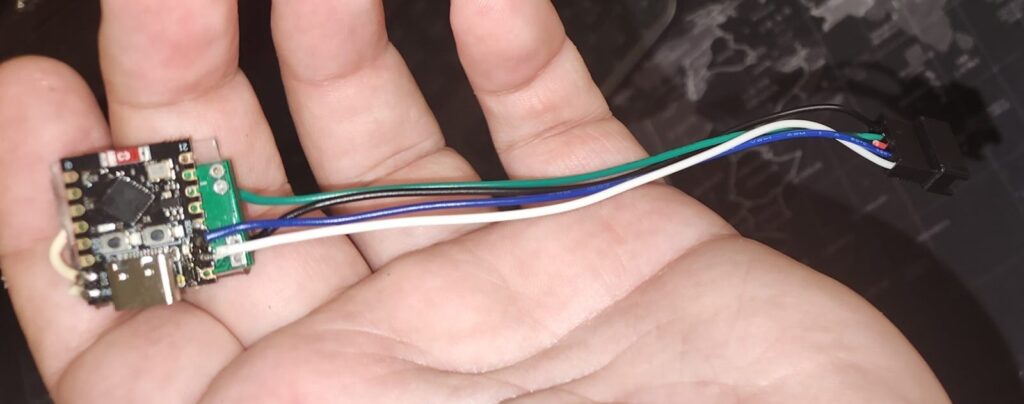
Working with a soldering iron
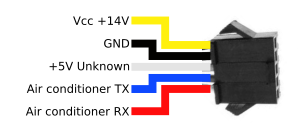
In accordance with the pinout of the air conditioner output connector, we connect the DC-DC converter input to the yellow +14V wire, hang a voltmeter on the output and turn the trimmer resistor until the output reaches 5.2 Volts (taking into account the absence of a load).
Yes, there is some kind of +5V wire in the pinout, but without knowing what it is needed for, I didn’t risk putting a load on it.
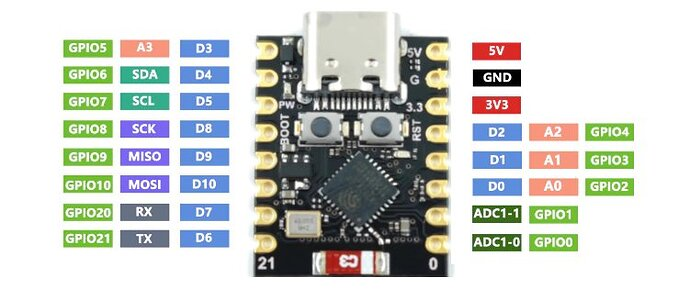
Next, solder the positive output from the converter to the esp32-C3 +5V input, the negative to GND, TX to GPIO6, and RX to GPIO7.
Firmware
There are different ways to flash the esp32, but since integration will require installing ESPhome in Home Assistant anyway, we’ll flash it directly from there.
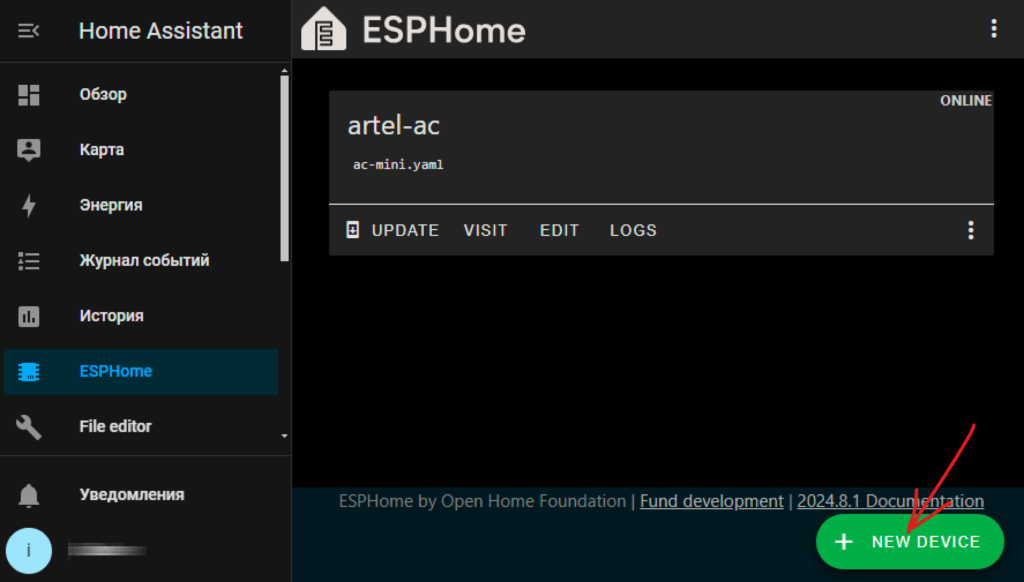
Add a new device to ESPhome. During the process, the device wizard will prompt you to give it a name (e.g., AC).
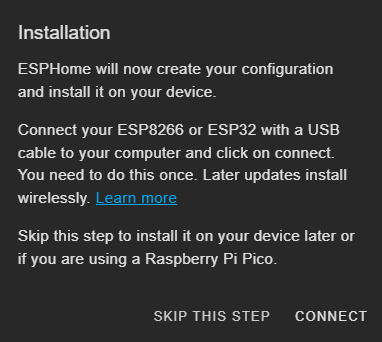
Next, you’ll be prompted to connect to the device. To save time, skip this step and then manually select your device from the list (in my case, the esp32-C3).
In the next dialog, click SKIP as well. We’re not interested in installing the stock firmware right now. We’ll upload it later, preconfigured.
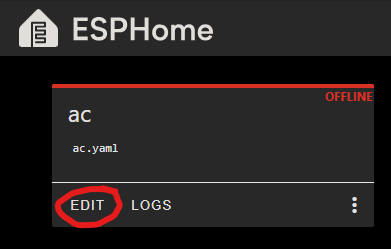
Now, on the device that appears, click EDIT and configure our device.
The original manual uses variables. In my example, all important parameters will be hardcoded, because, if something happens, it’s easier for me to reflash the board than to change parameters through the web portal.
 esphome:
  name: ac
  friendly_name: ac

esp32:
  board: esp32-c3-devkitm-1
  framework:
    type: arduino

external_components:
  - source:
      type: git
      url: https://github.com/GrKoR/esphome_aux_ac_component

logger:
    baud_rate: 0
api:
  encryption:
    key: "****" # этот ключ будет сгенерирован по ходу создания устройства, берите из его конфига.

ota:
  - platform: esphome
    password: "*****" # этот ключ, аналогично, берётся из сгенерированного конфига

wifi:
  ssid: "Ваш SSID"
  password: "пароль"

web_server:
  port: 80
  auth:
    username: "логин от веб интерфейса"
    password: "пароль"


uart:
  id: ac_uart_bus
  # ATTENTION! For TX and RX use GPIO4 (D2) and GPIO5 (D1) for NodeMCU-like boards!
  # See docs for details: https://github.com/GrKoR/esphome_aux_ac_component/blob/master/docs/HARDWARE-EN.md
  tx_pin: GPIO6
  rx_pin: GPIO7
  baud_rate: 4800
  data_bits: 8
  parity: EVEN
  stop_bits: 1

climate:
  - platform: aux_ac
    name: "Artel"
    period: 7s
    show_action: true
    display_inverted: false
    timeout: 150
    optimistic: true

    visual:
      min_temperature: 16
      max_temperature: 32
      temperature_step: 0.5
    supported_modes:
      - HEAT_COOL
      - COOL
      - HEAT
      - DRY
      - FAN_ONLY
    custom_fan_modes:
      - MUTE
      - TURBO
    supported_presets:
      - SLEEP
    custom_presets:
      - CLEAN
      - HEALTH
      - ANTIFUNGUS
    supported_swing_modes:
      - VERTICAL
      - HORIZONTAL
      - BOTH
After editing the configuration, click SAVE, and then INSTALL.
Connect the esp32-C3 to your computer’s USB port, then press and hold the boot button and click reset. This will put the device into firmware mode.
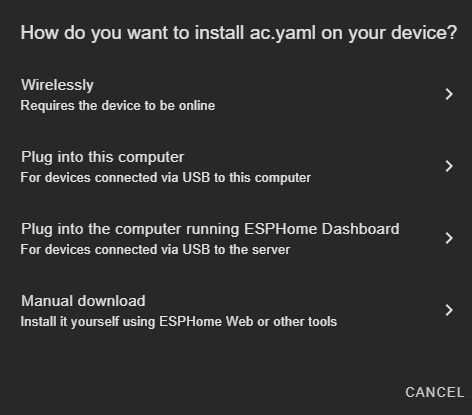
Here you can choose the firmware installation method. Since OTA isn’t working for us yet, we’ll select «Plug into this computer.»
In the browser dialog that appears, select the COM port corresponding to the device and click «Connect.»
If you correctly put the esp32 into flash mode, the firmware will be installed into the device’s memory after compilation. After the installation is complete, press reset again and check if the device connects to your WiFi network.
If everything is done correctly, the device’s status in ESPhome will change to ONLINE, and a new device will appear in the Home Assistant settings. Add it to the dashboard and enjoy the new smart home features.
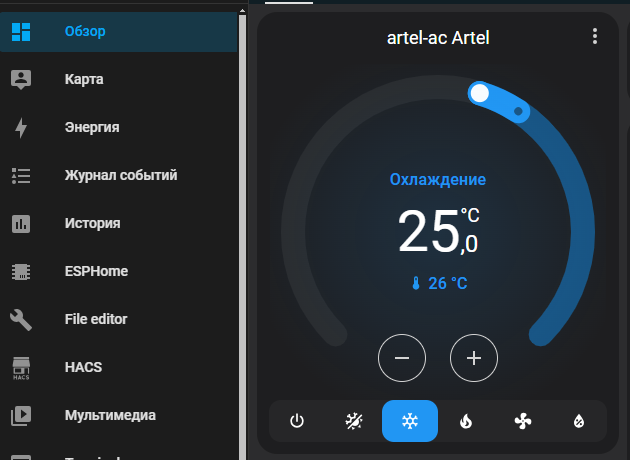
Alice, turn on the air conditioner!
If you have Yandex.Station integration, simply add this device to «UDYA» and you can control your air conditioner with your voice.
Command examples:
«Alice, turn on the air conditioner for cooling/heating/ventilation.»
«Alice, set the air conditioner to 24 degrees.»
«Alice, make it colder» (will lower the temperature by one degree)
«Alice, what mode is the air conditioner in now?» (Will tell you the current mode and temperature)
What’s remarkable is that your smart home will always know the current status of your air conditioner, even if someone changes it using a physical remote control. And this only works with two-way communication, unlike devices with infrared repeaters (the so-called «smart remotes»).
How about reliability?
Well, homemade ESP32 units aren’t always reliable, but my air conditioner has been working properly with my smart home for about a month now. Compared to the factory control module, that’s already an excellent result.
P.S.
All that’s left is to express my deepest respect to the project’s author, which I did by donating a little to him on TON. ;) Support enthusiasts, they’re the ones who keep everything bright in this world going!