
In the previous article, I promised to review this piece of hardware. No sooner said than done! :)
Here comes the long-awaited Chinese parcel.
The device arrived in a nice, sturdy box containing the board itself, and the empty space was filled with two more empty boxes. Apparently, the manufacturer reserved this space for a power supply and some cables. Oddly enough, neither of these are currently available in the official store.
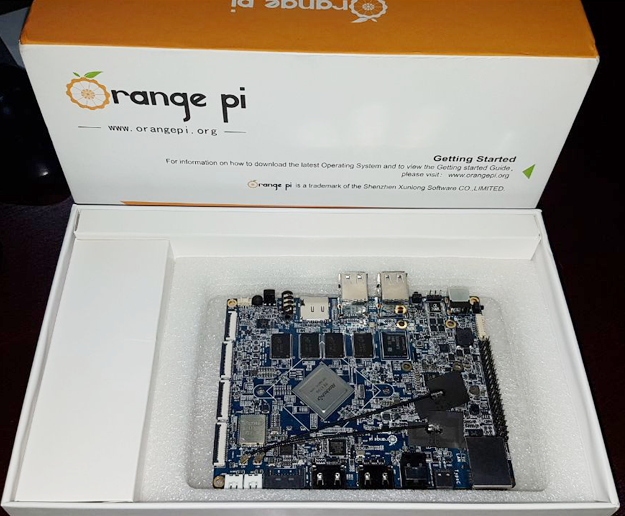
Specifications from the official website orangepi.com:
| Soc | Rockchip RK3399(28nm HKMG Process) |
| CPU | Six-CoreARM® 64-bit processor,up to 2.0GHz frequency Dual-Core Cortex-A72 and Quad-Core Cortex-A53 with separate NEON coprocessor |
| GPU | • ARM Mali-T860 MP4 Quad-Core GPU •Completely compatible with OpenGL ES1.1/2.0/3.0/3.1, OpenVG1.1, OpenCL, DX1 • Support AFBC |
| PMU | RK808 PMU BQ25700 Charger IC CW2015 Fuel Gas |
| Memory | 4GB DDR3 |
| Storage | 16GB High-Speed eMMC MicroSD (TF) Card Slot miniPCIe (for LTE / mSATA) mSATA interface |
| Wireless | Integrated WiFi Combo Module (AP6356S): 2.4GHz/5GHz Dual-Band WiFi, Support 802.11a/b/g/n/ac, 2×2 MIMO standard Bluetooth 4.1(Support BLE) |
| Ethernet | 10/100/1000Mbps Ethernet (Realtek RTL8211E |
| Display | 1 x HDMI 2.0 (Type-A), Support maximum 4K@60Hz display 1 x DP 1.2 (DisplayPort), Support maximum 4K@60Hz display 2 x MIPI, support 2560×1600@60fps output with dual channel 1 x eDP 1.3 (4 lanes with 10.8Gbps) 1 x HDMI IN |
| Audio | 1 x HDMI or 1 x DP (DispalyPort) for audio output 1 x Analog audio (via 3.5mm Combo Audio Jack for audio input and ouput) 1 x Speaker for audio output (1.5W 8Ω or 2.5W 4Ω) 1 x SPDIF 1 x On-board Microphone 1 x I2S (up to 8 channels) for audio input and output 1 x Mic Array Interface |
| Camera | 2 x MIPI-CSI (13Mpixel Max for each port )(OV13850(13M)) Support USB Camera |
| Sensor | 1 x Gyroscope+G-Sensor(MPU6500) 1 x Gyroscope (LSM6DS3) 1 x HALL Sensor (HAL248TWCL) 1 x Light Sensor (CM32181) 1 x Compass (AK09911) |
| PCIe | 1 x Mini PCIe Compatible USB, used for LTE or TF Card Compatible mSATA, used for expand SATA hard disk or SSD |
| SIM | 1 x SIM slot, use as LTE module for miniPCIe extension |
| USB | 4 x USB2.0 HOST, 1 x USB3.0 Type-C |
| IR | 1 x IR, Support IR control function |
| LED | 2 x Power Status LED (Red and Green) 1 x SATA Power Status LED(Green) |
| Key | 1 x Reset Button,1 x Power Button,1 x Recovery Button, 1 x Menu Button,1 x Return Button,1 x Vol+ Button,1 x Vol- Button |
| Debugging | 1 x Serial Console |
| Reserved Interface | 40-pin 2.54mm header 4 x I2C, 1 x SPI, 2 x UART 5 x GPIO |
| External Power supply interface | DC12V — 2A (2 pins) DC5V — 2A (2 pins) |
| Power | DC12V-2A (via DC 5.5*2.1mm Jack) TypeC 5V-3A Battery (Dual Battery 7.4V) |
Preparation and launch
After measuring the mounting hole locations, I managed to coax a suitable heatsink from the guys. I also bought a 12-volt cooler, exactly the right size for the heatsink. I plugged it directly into the 12-volt jack on the board with its stock connector. The plug fit, but the polarity didn’t. I had to swap the wires. Incidentally, it seems the problem wasn’t with the wires, but with the polarity on the board itself, since the separate connector I bought at another store had the exact same wire orientation…
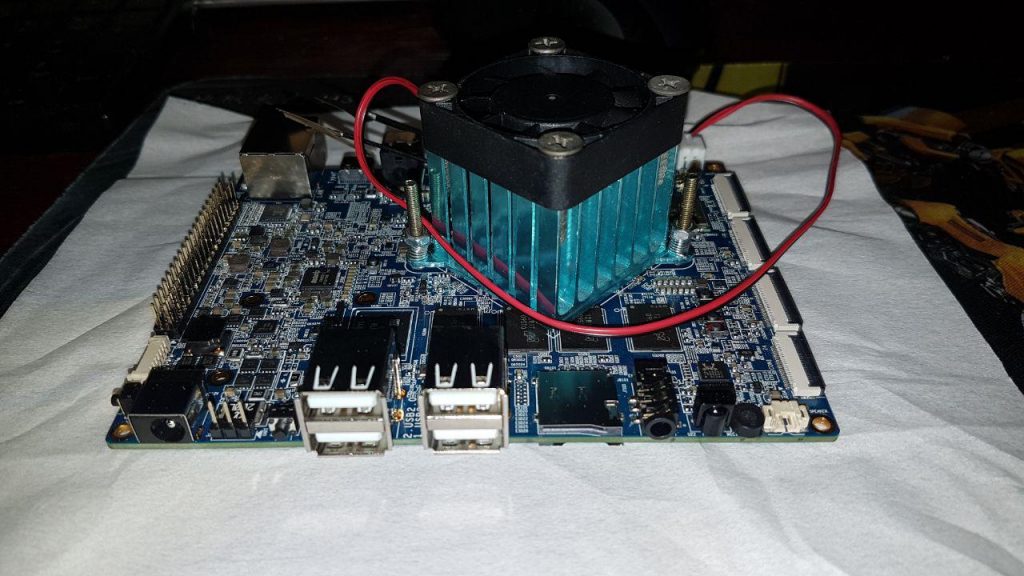
I later decided to remove the cooler, as it turns out passive cooling is quite capable of dissipating the heat generated by the chip. Perhaps I just haven’t tested it under heavy load yet, but for now, I can enjoy the silent operation of the device. Although I wouldn’t call it completely silent. When operating, the board emits a very quiet but unpleasant noise, bordering on ultrasonic.
I decided to use the power supply from the CCTV unit that hosts both my NVR and the camera. Its rated power is 10 amps, which easily covers the power requirements of everything I’ve hooked up to it. At least, I didn’t see any voltage drops during my field tests.
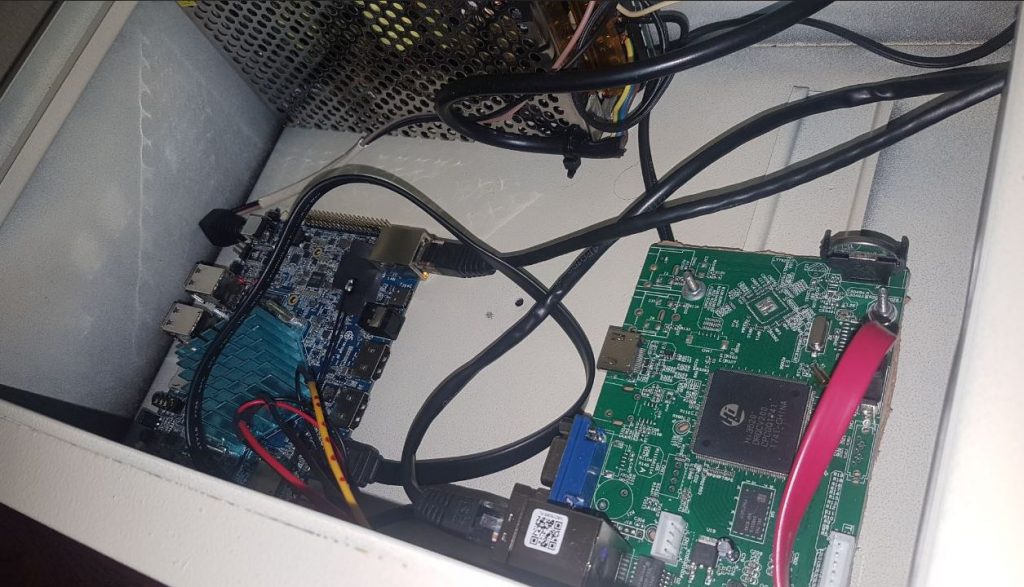
After turning on the device, the Android logo appeared on the monitor. It was installed in eMMC memory from the factory. The only thing I tried to test on this image was the ability to connect an mSATA SSD drive.
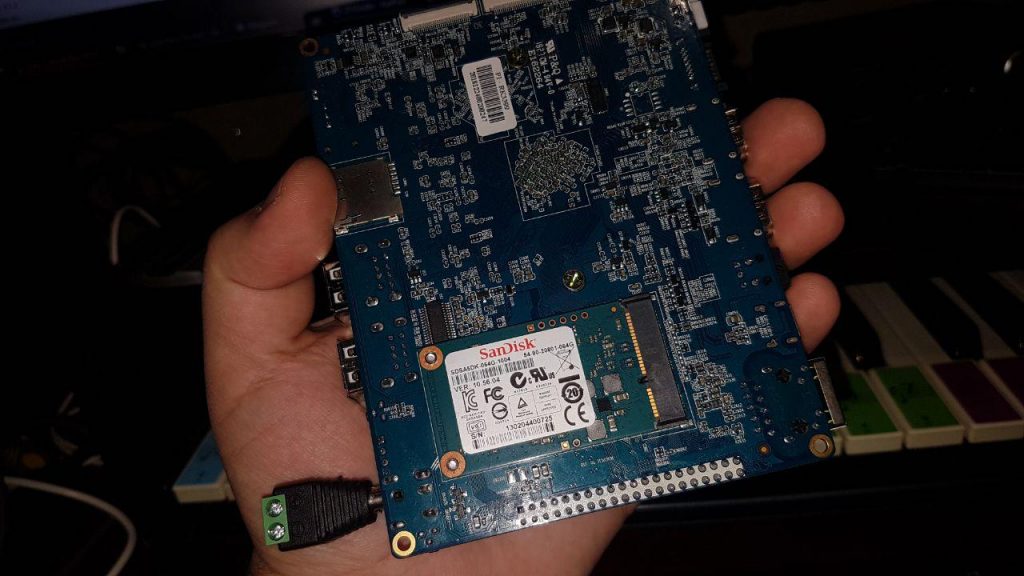
As it later turned out, connecting an SSD directly to a PCI-e socket doesn’t work with any of the operating system images, despite the official specifications stating this capability. Now I’m unsure whether the drivers are flawed or whether they lied about supporting this connection altogether. When I searched for information about this hardware before purchasing it, I couldn’t find anything on the matter. I’m hoping that an update will eventually release mSATA SSD support, but that’s not a given.
Software
This is where things get interesting. The official website offers several crappy options for installing on this device. And they can all be safely thrown in the trash, as they’re just old crap. Why you’d want to install Android on such a computer is a different question. I’m interested in a distribution for a good home server. Naturally, I decided to install my favorite Armbian. Unfortunately, Armbian for the Orange PI rk3399 is still in testing and, according to the developers, is not suitable for serious projects. But since there’s nothing better, I’ll have to use this image for building a home server. :)
Of course, you can simply download a ready-made image from the Armbian website, but I decided to build the latest image for myself. You can read how to do this here.
Just for fun, I first built a desktop distro to evaluate its performance in a user environment.
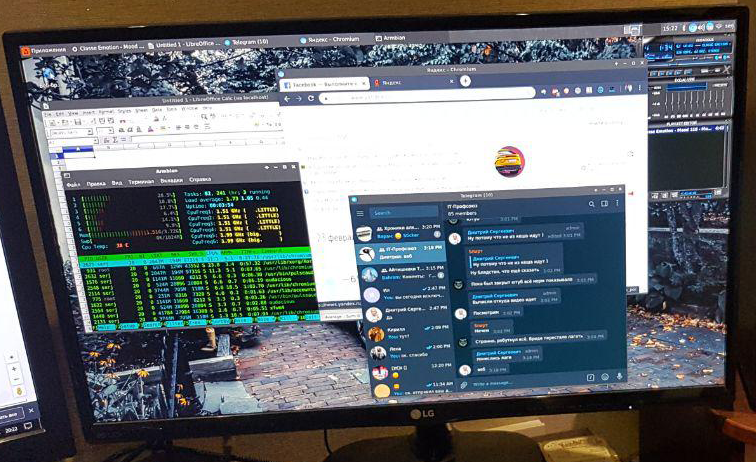
I can’t say I’m impressed, but compared to the Orange Pi PC+, this hardware performed much better. The graphical interface runs relatively smoothly. In fact, I’d say this computer is perfectly capable of powering an accountant or someone with similar requirements. The browser works quite well, and Libre Office is a great replacement for you know what… ;)
The environment is quite user-friendly, but I did encounter a glitch with Bluetooth. I connected a wireless speaker (which works perfectly with the phone) and instead of normal sound, I got an intermittent buffer sniffle. However, this is most likely a software issue and will be fixed someday.
Installation
Installing Armbian requires an SD card with an OS image burned to it. However, it wasn’t as straightforward as with Allwinner-based models. The device doesn’t boot from the SD card, but immediately launches Android installed in the internal ROM. The official documentation suggests some vague methods for flashing the firmware via a USB cable, but I didn’t have a Type-C cable handy.
If you’re too lazy to build your own image, you can use mine. It’s a desktop-only image without any kernel modifications. You’re welcome. ;)
To force the device to boot from the card, you need to do the following:
- We insert the previously prepared SD card into the slot.
- Take tweezers or any other piece of metal with good conductivity (I did this with nippers :))
- We short-circuit point TP50265 and the ground of the PCI-e mount (I don’t know why exactly there… An attempt to poke at point GND was unsuccessful, although logically it should have worked)
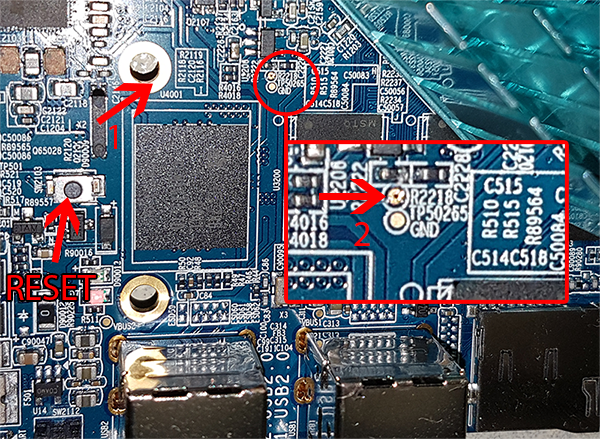
4. While holding these points closed, press reset and almost immediately release the test point.
If the screen displays the normal Linux boot sequence, then everything is going according to plan. If it’s Android again, try repeating the procedure. Sometimes the SD card is the problem. It worked perfectly for me with a 16GB Kingston card.
After the OS has booted, log in as root with the password 1234 and change the password. To move Armbian to EMMC, run the «nand-sata-install» utility in the console and follow the instructions in the pseudo-graphical windows.
After installing in emmc, I connected the hard drive to the SATA port and mounted it to /var. This allows you to expand the storage space and conserve the internal flash drive.
As for the purchase, my opinion is that the device’s software is rather crude. The manufacturer hasn’t even managed to churn out any accessories yet. There are no cables, no case, no proper cooling system, and no battery with an obscure 6-pin connector, which has an input on the board itself. The price of the single-board computer is close to that of an old PC kit. But if you need a silent device with minimal power consumption, this is a perfectly reasonable choice.
Well, that’s all for now. I hope this information is useful to someone.