
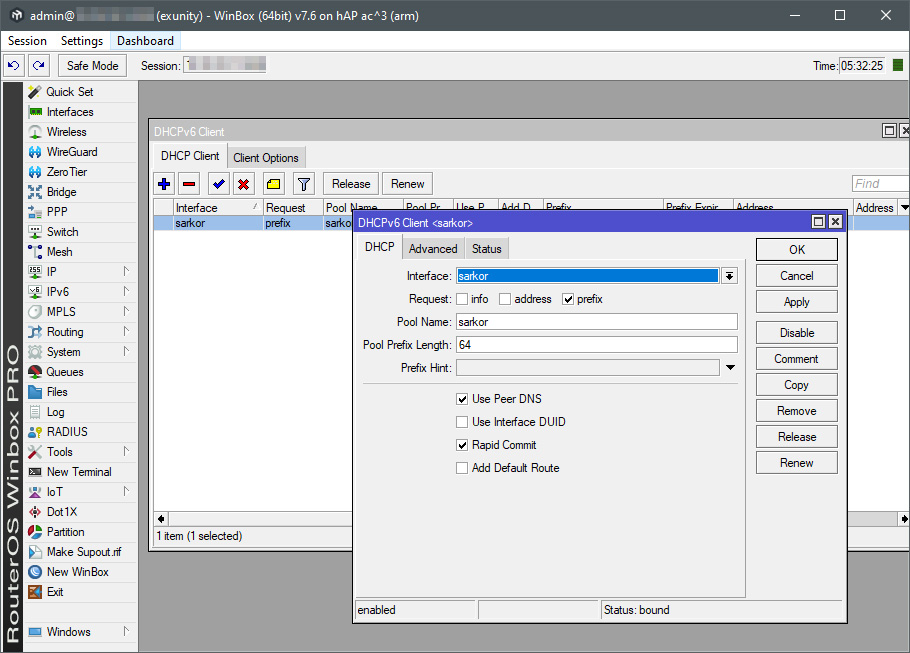
 In the interfaces, select your PPPoE connection towards Sarcor. You can enter any name for the pool. The prefix length in my case is /64 bits. If you’re lucky enough to have a larger network, use the corresponding number. We’ll get the default route anyway, so you don’t need to check this box. 2) If everything went as expected, you’ll see Status: bound in the lower right corner of the DHCP client settings window, and in the status tab, you’ll find the prefix assigned by your ISP. Copy this prefix to the clipboard and go to IPv6 > Addresses.
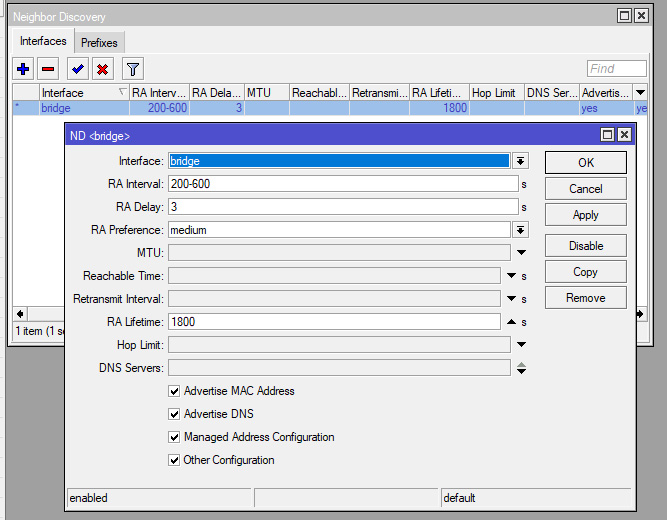
 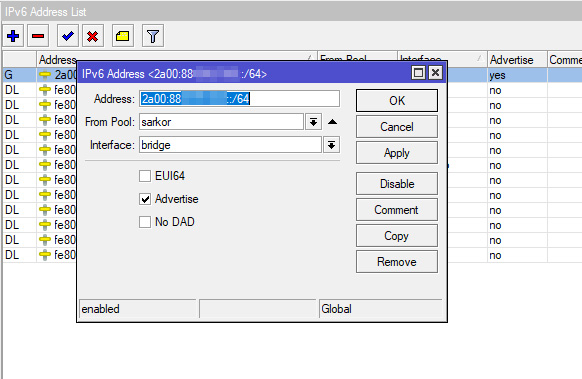 Add a new address. In the address field, paste the previously copied prefix from the clipboard. In the «From pool» field, select the address pool. If it doesn’t appear, something went wrong in the previous steps. For the interface, select the interface through which your router will distribute addresses to the local network. This method will replace the familiar DHCPv4. Instead of DHCP, we’ll use «Advertising,» which in this case can be translated as announcing addresses to the network. If you want to distribute addresses, check the appropriate box. An alternative is to manually assign them only to the required devices, rather than handing out addresses to just anyone. Keep in mind that our beloved tas-ix isn’t currently fully aware of IPv6, so traffic in this address space will likely bypass any peering connections or local CDNs. Consider carefully whether this is necessary for you. :) 3) If you haven’t changed your mind, go to IPv6 > Neighbor Discovery and make sure ND is enabled for the interface where our network neighborhood resides. By default, this setting is set to allow all interfaces, but I chose to limit myself to my LAN’s bridge, as I have a lot of interfaces, and there’s absolutely no need to assign addresses to them.
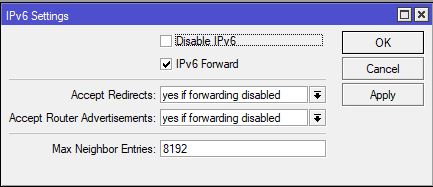
  4) Also, just to be on the safe side, it’s worth looking into ipv6 > settings and making sure that protocol support is not disabled and transit (forward) is not prohibited.
  If necessary, you can go to IP > DNS and add any additional v6 DNS server addresses. In my case, I already received them dynamically via DHCPv6. 5) And then there comes a point when everything seems to be working, but then a nasty surprise awaited me. Half the websites don’t open, and the SSH session over IPv6 simply hangs a few seconds after connecting. I tried opening an SSH session directly from the Mikrotik, and surprisingly, it worked fine. Then it occurred to me to check the packet size coming through the network from the router and from the LAN client. Pings with different packet lengths immediately revealed the key: while packets from the router easily reached 1492 bytes (the MTU of the PPPoE connection), the maximum size from the client machine was 1444 bytes. Well, that’s way out of the question! ;) To be honest, I still haven’t figured out the reason for this behavior, so I solved the problem by adding automatic packet size adjustment rules to the firewall. So, go to IPv6 > Firewall > Mangle and click the plus sign.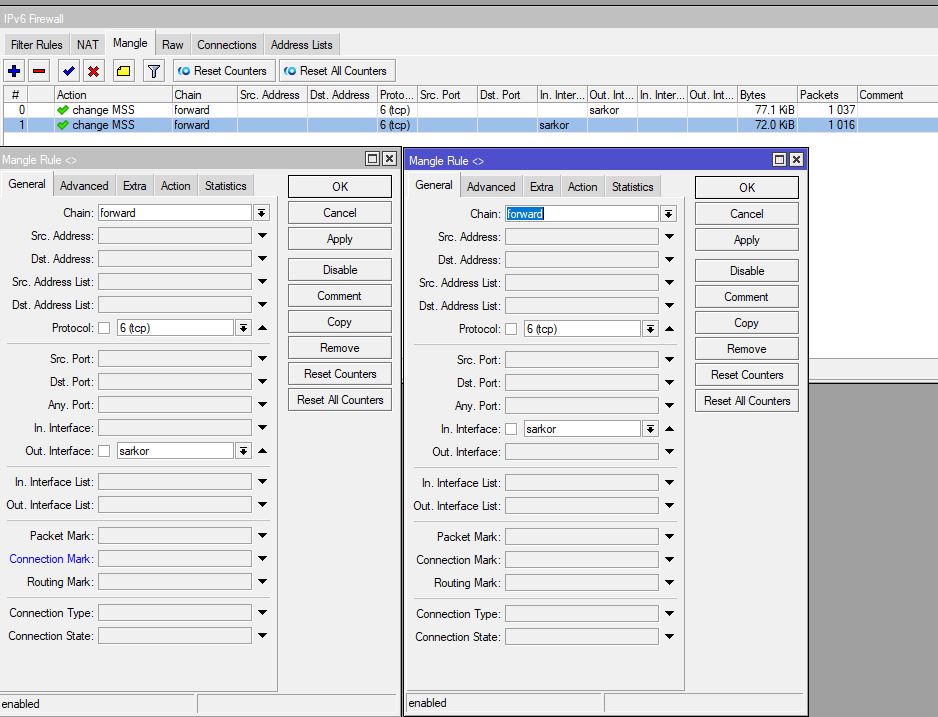
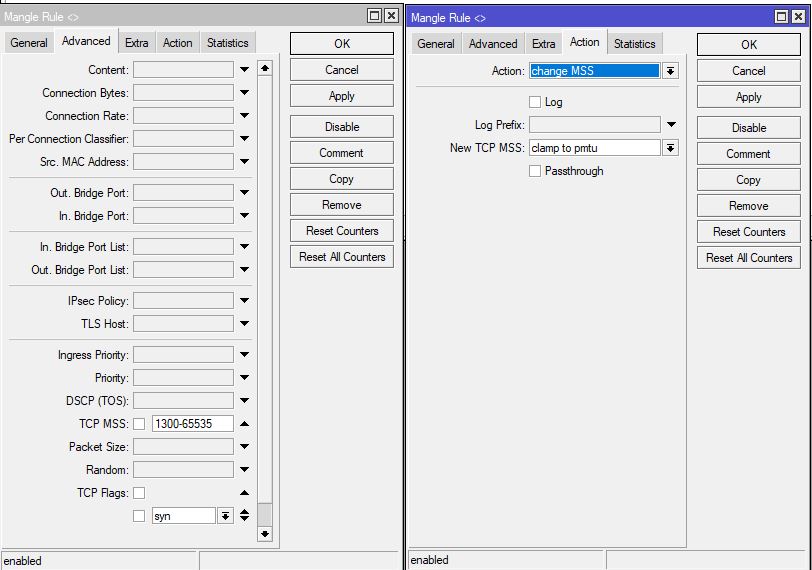 The two rules have different directions only, everything else is identical to each other.
Final stop:
If you did everything correctly, ping my site, and you will see a long and ugly IPv6 address. ;) 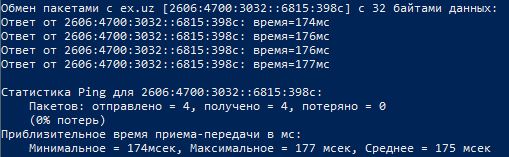 IMPORTANT! I’ll remind you again! Don’t forget about the firewall. Here are the basic rules that will block all external activity while allowing your local network to access the internet.
 /ipv6 firewall filter Replace the interface name with the name of your PPPoE connection. Add exceptions as needed. Boil for 20 minutes, add salt to taste. ;)
add action=accept chain=input comment="Related, Established" connection-state=\
established,related,untracked
add action=accept chain=input comment="accept from my net" in-interface=bridge
add action=accept chain=input comment="accept ICMPv6" protocol=icmpv6
add action=accept chain=forward comment="Related, established" connection-state=\
established,related,untracked in-interface=sarkor
add action=drop chain=forward comment="DROP fw to my net" connection-state=invalid,new in-interface=\
sarkor
add action=drop chain=input comment="DROP all input" connection-state=invalid,new in-interface=sarkor \
protocol=tcp